Using Tracy for Profiling and Observability
Tracy is an amazing profiler and observability tool for C, C++11, and Lua.
Note
Although Rust and Zig are not in the list of officially supported languages, Tracy has been successfully integrated with them using the C API.
It is fairly well documented barring the process for integrating it with languages other than C++. This article is my attempt towards filling that hole in Tracy's documentation. I'll document my Tracy usage for C, Rust, and Zig and provide examples which can act as jumping points for others. Hopefully by the end I'll be able to demonstrate how incredibly useful a tool it really is.
Building the server
First we need to build the Tracy server, on Unix systems that entails:
- Installing some external libraries - instructions are distro specific so I can't be of much help here. Kindly refer to section '2.3 Building the server' of the Tracy user manual for details.
$ git clone https://github.com/wolfpld/tracy.git
$ cd tracy/profiler/build/unix
$ make
Tip
If you are using the nix package manager, you just need to install the package named
tracyto install the Tracy server.
Apologies
Windows users would have to refer to section '2.3 Building the server' of the Tracy user manual and figure this out for themselves.
Client setup and markup (Rust)
Note
Client setup is language dependent so refer to the section pertaining to the language you are working in. Though client markup is language dependent too, the API for it is similar for all languages so we are going to cover it in detail for Rust only.
Client setup
Client setup for Rust is the easiest, all you need to do is add the following line to your Cargo.toml file:
tracy-client = { version = "0.12.6", default-features = false, features = ["enable"] }
Note
Make sure that you are using a supported version of the Tracy server (v0.7.8 at the time of writing this article) as described here.
Client markup
- Begin a span region, which will be terminated once _span goes out of scope (function, file, and line are determined automatically):
let _span = tracy_client::span!("some span");
we can also use Span::new to do the same:
let span = Span::new(&format!("fib({})", i), "fib", file!(), line!(), 100);
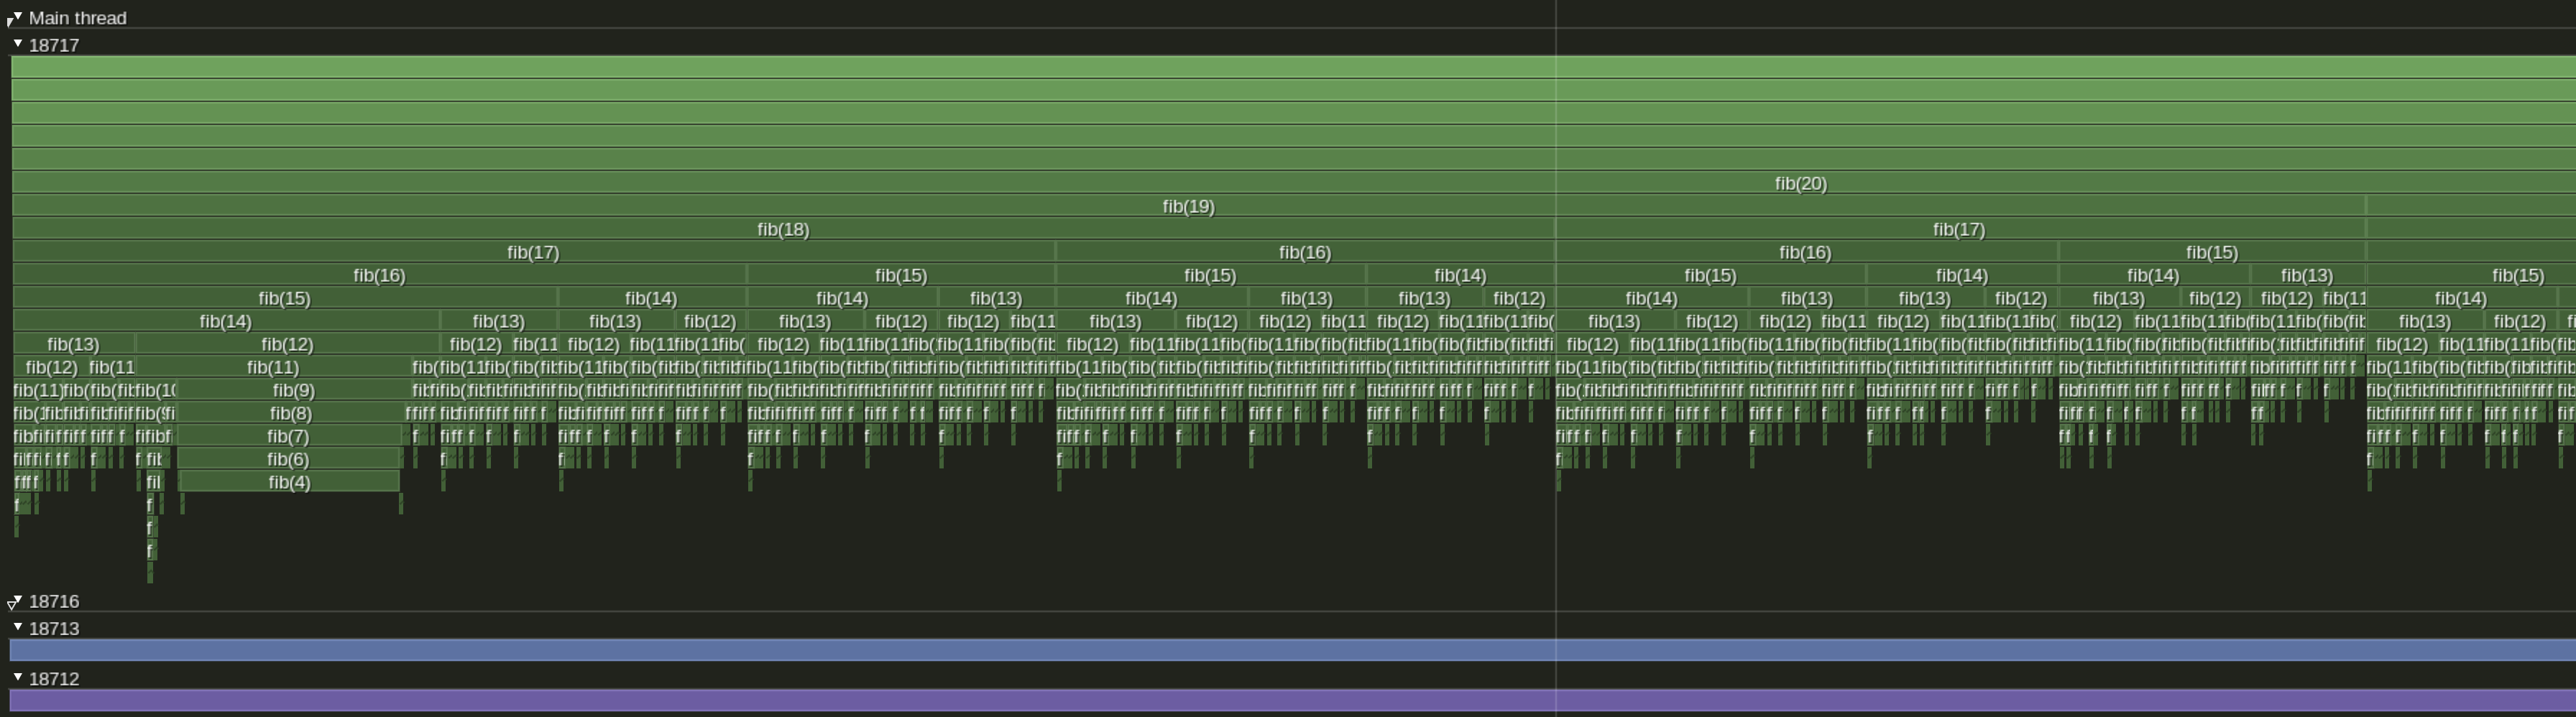
Marked spans are then displayed in Tracy:
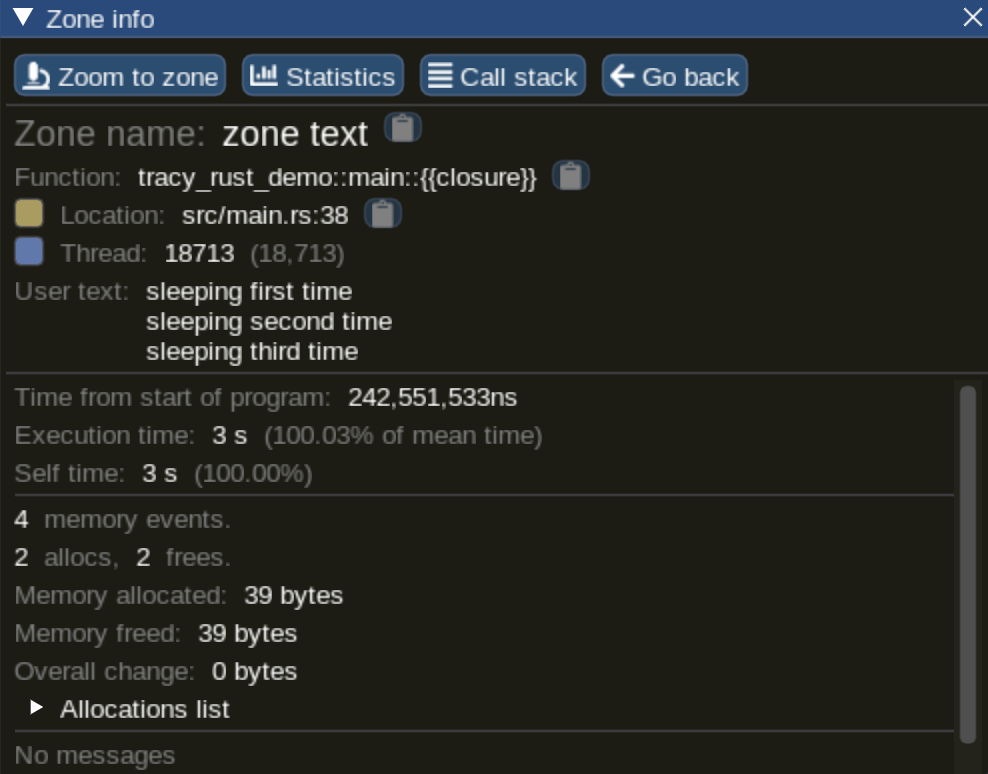
emit_value and emit_text can be used to add more context to the span:
span.emit_value(42);
span.emit_text("sleeping first time");
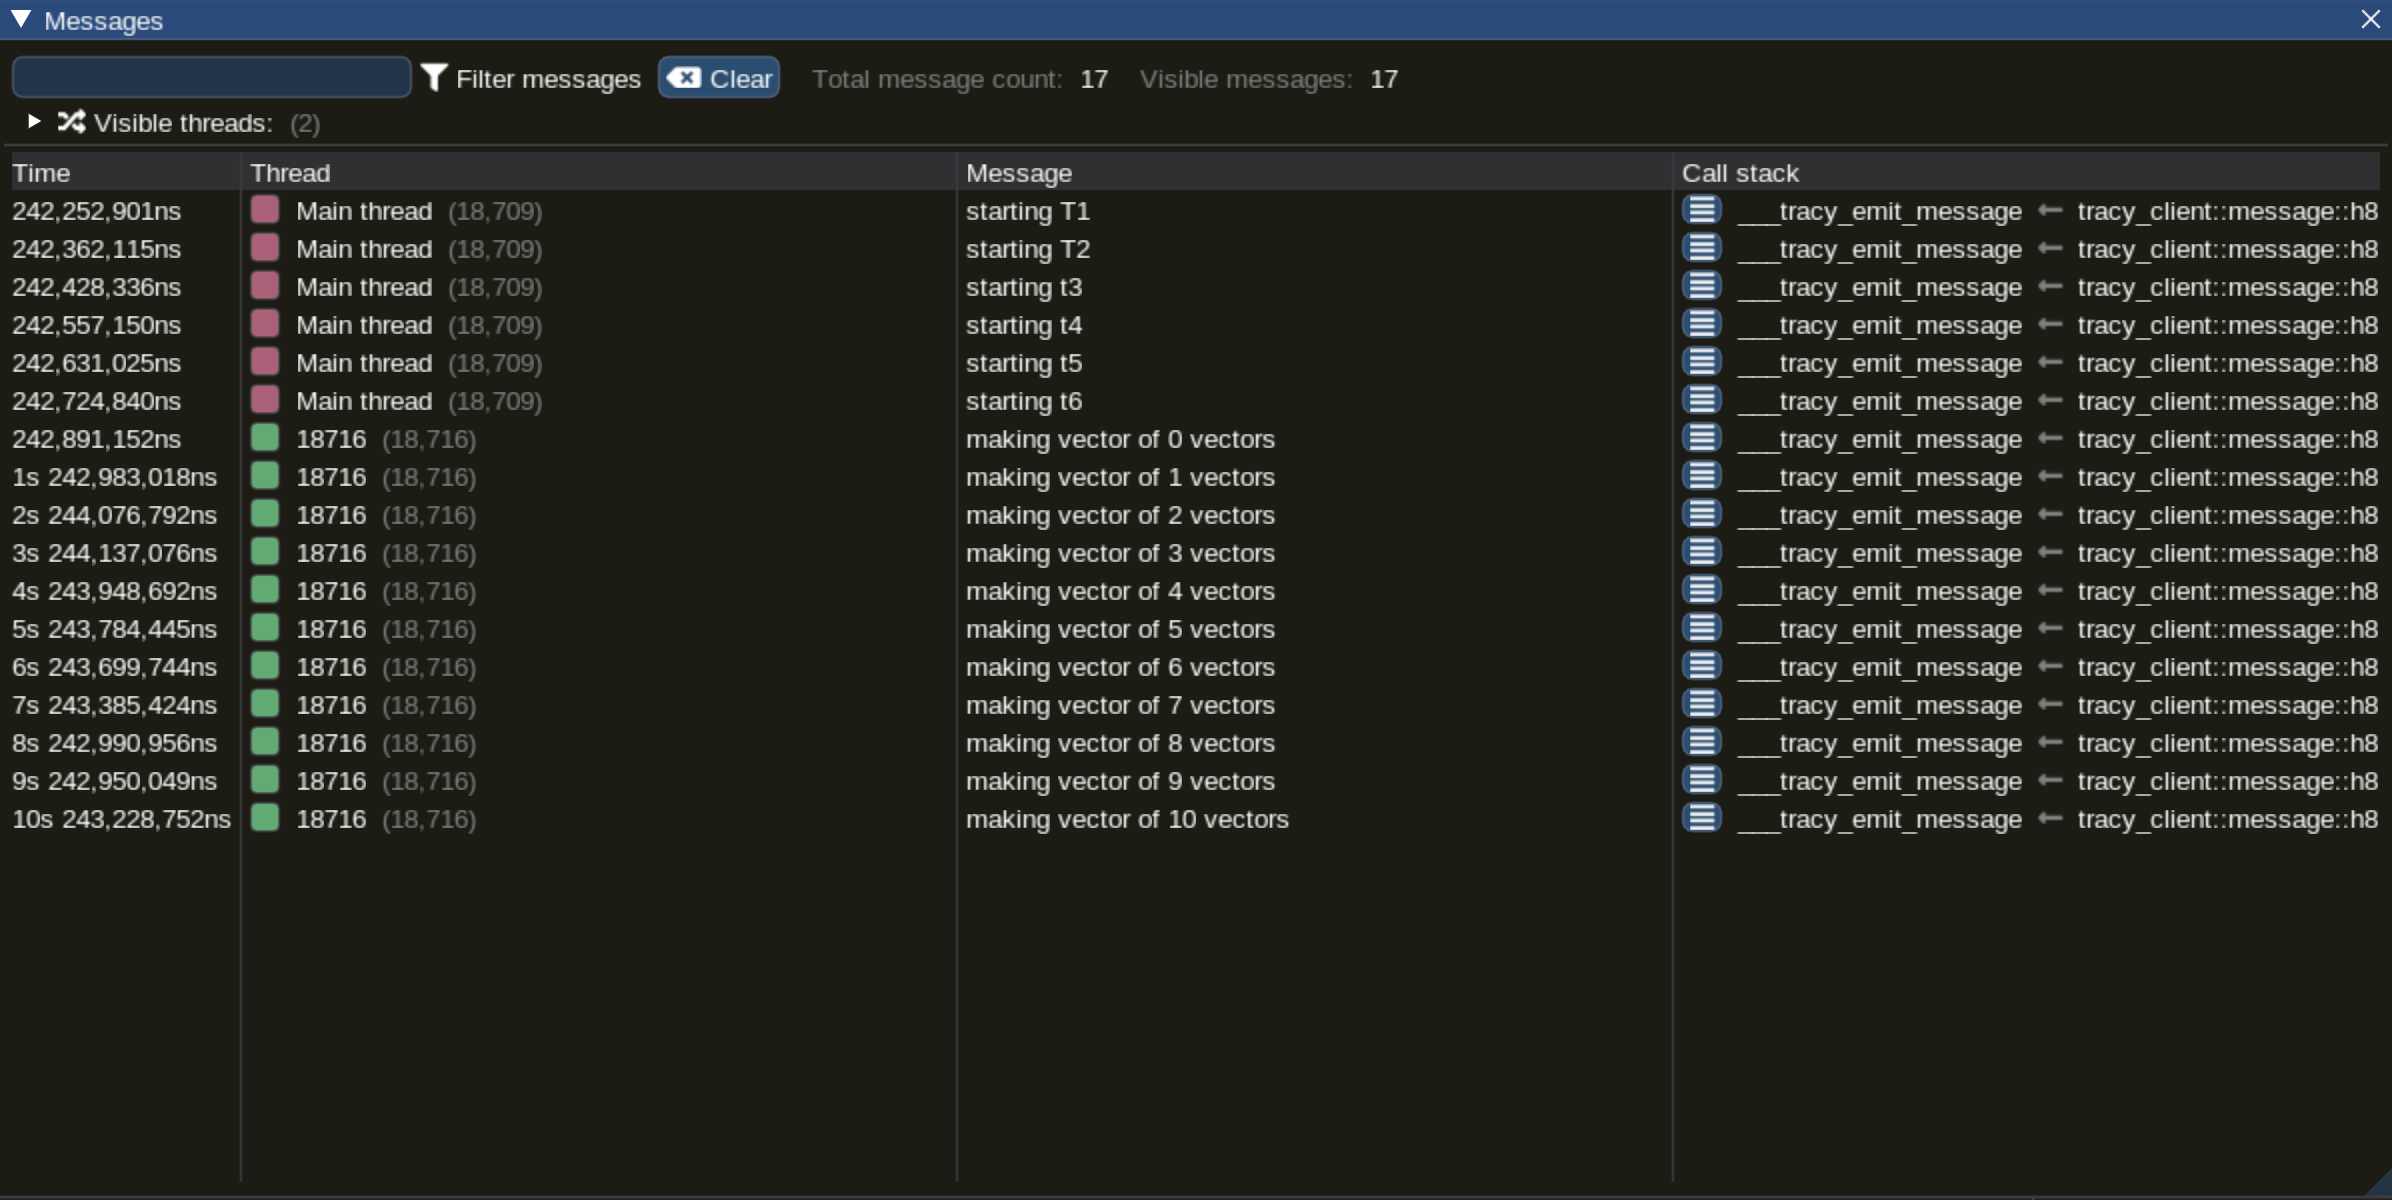
- Output a message on the timeline:
message("starting t6", 10);
- Create an instance of plot that can plot arbitrary f64 values:
static TEMPERATURE: Plot = create_plot!("temperature");
TEMPERATURE.point(37.0);

- Profile memory use:
#[global_allocator]
static GLOBAL: ProfiledAllocator<std::alloc::System> =
    ProfiledAllocator::new(std::alloc::System, 100);

Note
This feature is much more useful in
C, C++11, and Zig.
- Mark a frame:
finish_continuous_frame!("T1");
- Analyze runtime stats:
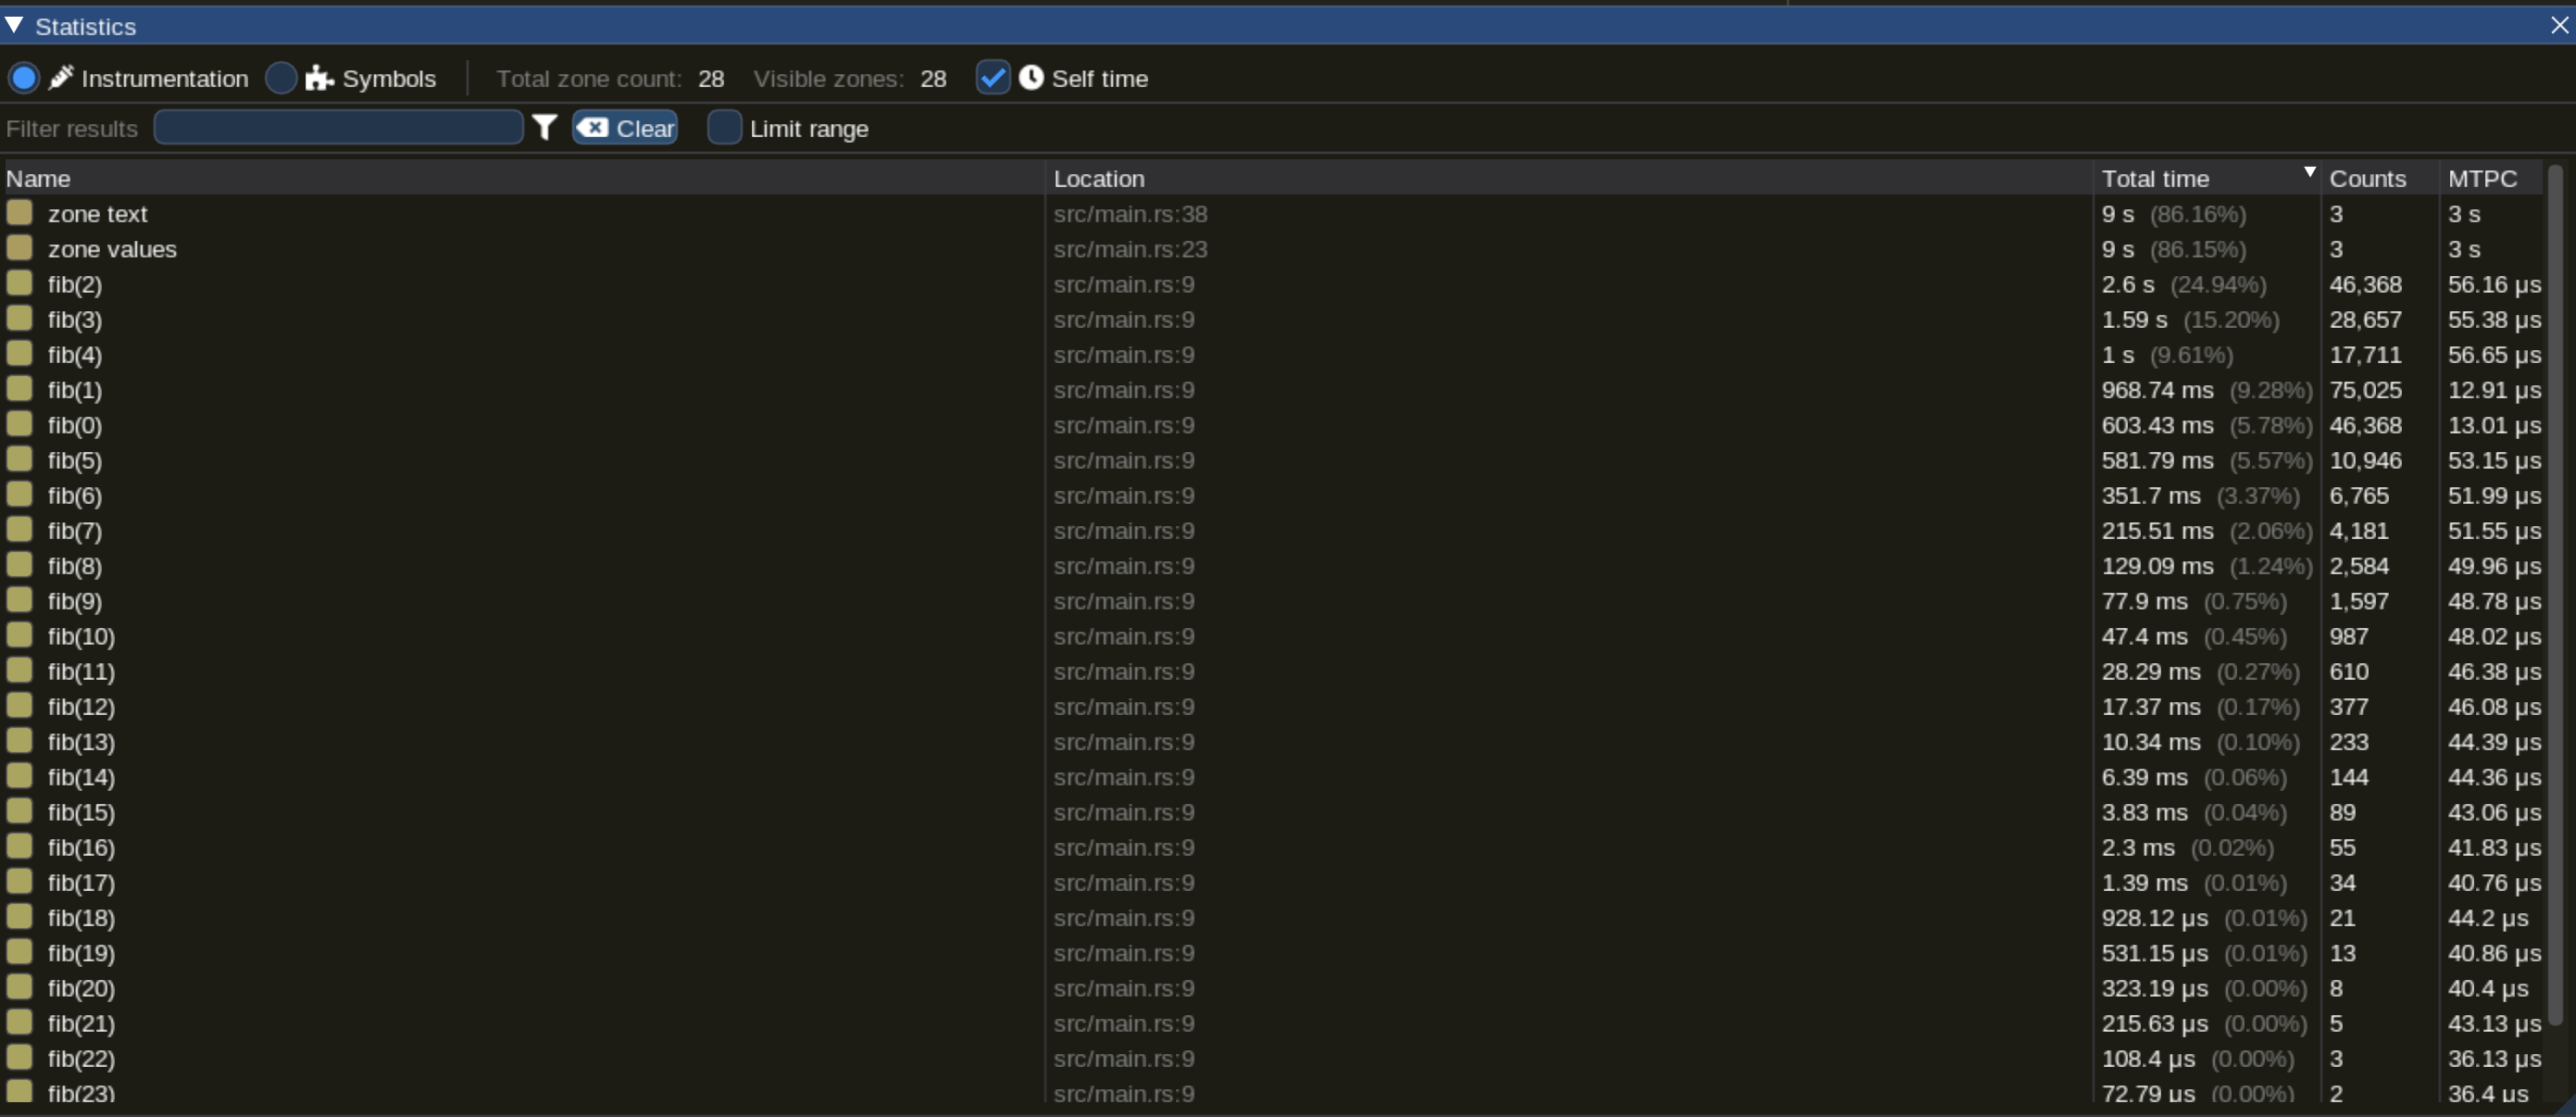
Tracy is chock-full of features, above we covered few of the major ones. Play around with the rust example project and refer to the documentation of rust_tracy_client to continue your journey!

Client setup and markup (Zig)
We are going to demonstrate the process for Zig a bit differently by integrating Tracy with a game, more specifically the Pacman clone by floooh. Integrating Tracy with any other Zig project would then be just a matter of replicating the demonstrated steps.
Client setup
- Make the necessary changes in build.zig [commit for reference]
- Add tracy.zig to project [commit for reference]
- Add tracy repo to project [commit for reference]
Client markup
- tracy.zig contains all the functions required for client markup. They are similar to the ones covered for Rust above so refer to this commit and start playing around!
- Build project with:
$ zig build -Dtracy=./tracy -Dtracy-allocation -Dtracy-callstack
Complete code for the Pacman clone integrated with Tracy can be found here.
Client setup and markup (C)
First thing needed is a build system for C, meson is the one we are going forward with. Feel free to adapt the instructions to the build system of your choice.
Client setup
- Add the Tracy repository to your project directory
- Add project/tracy/TracyClient.cpp as a source file
- Add project/tracy as an include directory
Note
For reference
meson.buildthat performs steps 2 and 3 can be found here.
- Place trace.h in your include path
Note
trace.hcontains macros that wrap the Tracy C API, feel free to write your own abstraction layer, or use the Tracy C API itself.
Client markup
For client markup just use the macros in trace.h:
#include "trace.h"

int main(int argc, char** argv) {
  START_ZONE;
  END_ZONE;
  return 0;
}
Complete code for the C example project can be found here.
Fin
Tracy is an invaluable tool, I hope you find this article helpful in adding it to your tool-belt.
This work is licensed under CC BY-NC-SA 4.0.